As I write this, the holiday shopping season has started but the rumored tablets, netbooks and eReaders with the Pixel Qi screens have not materialized. So for now, the OLPC XO-1 computer is my favorite netbook and eReader device.
I did not get there without changing the standard operating system and software that came with the unit. Sugar OS, while impressive and undoubtedly well suited for children and learning, simply got in my way more often than not.
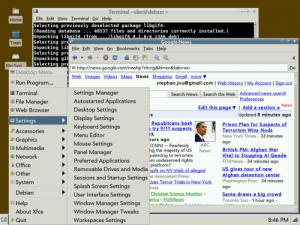
The first step to getting grown up value out of your child-focused OLPC is to install a new operating system on it! I’ll document the steps in a series of posts. When we’re done, we’ll have transformed our child-focused machine to a fully-functional Debian Linux based system with full support for wifi, screen rotation, ebook mode, and look like the screenshot below.
The first step is to unlock or “jailbreak” your OLPC, so that we can make changes to the firmware and the OS.
There is little risk to what we’re about to do. Everything we’re doing can be reverted back (with some work) to Sugar.
Here’s what you’ll need:
- your OLPC XO-1
- a USB key of at least 512MB
- some patience
Let’s go!
Your OLPC XO-1 as delivered from the factory has security enabled on it that protects it from unofficial software. However, unlike some other companies, this protection is not meant to lock out users from customizing and hacking their hardware as they wish. The first step is to follow the official instructions from the OLPC organization themselves on how to unlock your XO-1.
Read through the instructions on the OLPC wiki.
In summary, you’ll want to do the following things:
- Follow the instructions on the wiki to obtain a developer key for your XO-1. This should get you a magic file named “developer.sig”. This file is unique to your machine and will let you unlock it, so it’s probably a good idea to make a backup of this key on your PC.
- Create a directory called “security” on your USB key, and copy developer.sig into this directory (e.g. so it shows up as X:\security\developer.sig under Windows). At this point, booting your XO-1 with this USB key inserted will unlock it!
- Permamently unlock your OLPC. Boot your machine with the USB key inserted, and press the ESC key (looks like an X in the top left) until you see the ok prompt. Enter “disable-security” and press Enter. (Entering “enable-security” would reverse the unlock.)
That’s it! Congratulations. You’re unlocked! You can now modify your firmware and OS even if the USB key with the developer key is not inserted.
